The Nesscart
Complete Guide
Learn how to master every inch of your Nesscart dashboard. From product management to Indian GST logic, we've got you covered.
01Getting Started
Introduction
Nesscart is a high-performance e-commerce engine built with Next.js 16, TypeScript, and MongoDB. It features a robust admin panel, AI content studio, and seamless payment integrations for a global audience.
Core Requirements
- Node.js 18.x or higher
- MongoDB Database
- Cloudinary Account
- SMTP/Brevo for Emails
02Installation Guide
Deploying to Vercel
Vercel is the recommended platform for hosting Nesscart due to its native support for Next.js features.
- Push your Nesscart code to a private **GitHub repository**.
- Log in to Vercel and click **"New Project"**.
- Import your Nesscart repository.
- In the **Environment Variables** section, add all keys from your `.env.example` file (see MongoDB & Cloudinary steps below).
- Click **Deploy**. Vercel will automatically build and assign a production URL.
Cloudinary (Media Storage)
Nesscart uses Cloudinary for high-performance image hosting and on-the-fly optimization.
- Create a free account at Cloudinary.com.
- Go to your **Dashboard** and find your **Product Environment Credentials**.
- Copy the following to your environment variables:
NEXT_PUBLIC_CLOUDINARY_CLOUD_NAMECLOUDINARY_API_KEYCLOUDINARY_API_SECRET
MongoDB Database
A MongoDB database is required to store your products, orders, and site data.
- Sign up for MongoDB Atlas (Free Cluster works great).
- Create a new **Database User** with read/write permissions.
- Under **Network Access**, whitelist `0.0.0.0/0` (or your server IP) to allow connections.
- Click **Connect** -> **Drivers** and copy the **Connection String**.
- Replace <password> with your actual user password and add it to
DATABASE_URLin your env settings.
Hostinger Installation (VPS)
For Hostinger, we recommend a **VPS** running Ubuntu for the best performance. You can also follow the officialHostinger Node.js Deployment Guide for detailed steps.
- Connect to your VPS via SSH.
- Install Node.js:
curl -fsSL https://deb.nodesource.com/setup_18.x | sudo -E bash - && sudo apt-get install -y nodejs - Clone your GitHub repo:
git clone https://github.com/youruser/nesscart.git - Install dependencies and build:
npm install && npm run build - Start the app using **PM2**:
sudo npm install -g pm2 && pm2 start npm --name "nesscart" -- start - Configure **Nginx** as a reverse proxy to point your domain to port `3000`.
03Dashboard & Analytics
The **Dashboard** is your command center for real-time store monitoring and KPI tracking. View Sales, Trending Products, and Revenue Graphs instantly.
04Product Management
Add, Edit, and Manage your catalog. Supports **Variant Management** (Size/Color), SKU tracking, and specialized fields for discounted pricing.
05Categories
Organize products into a hierarchical structure. Supports nested sub-categories and custom hero images for each category landing page.
06Collection Manager
Curate custom groups of products like **"New Arrivals"** or **"Flash Sale"**. Collections can be linked to homepage sliders or dedicated landing pages.
07Brand Manager
Manage your manufacturers. Upload brand logos to build trust and enable brand-based filtering for your customers.
08Order Management
Track status from **Pending to Delivered**. Generate professional PDF invoices, manage shipping labels, and handle customer returns efficiently.
10Media Library
Centralized asset gallery. Upload images once and reuse them across banners, products, and pages. Includes built-in image optimization and CDN caching.
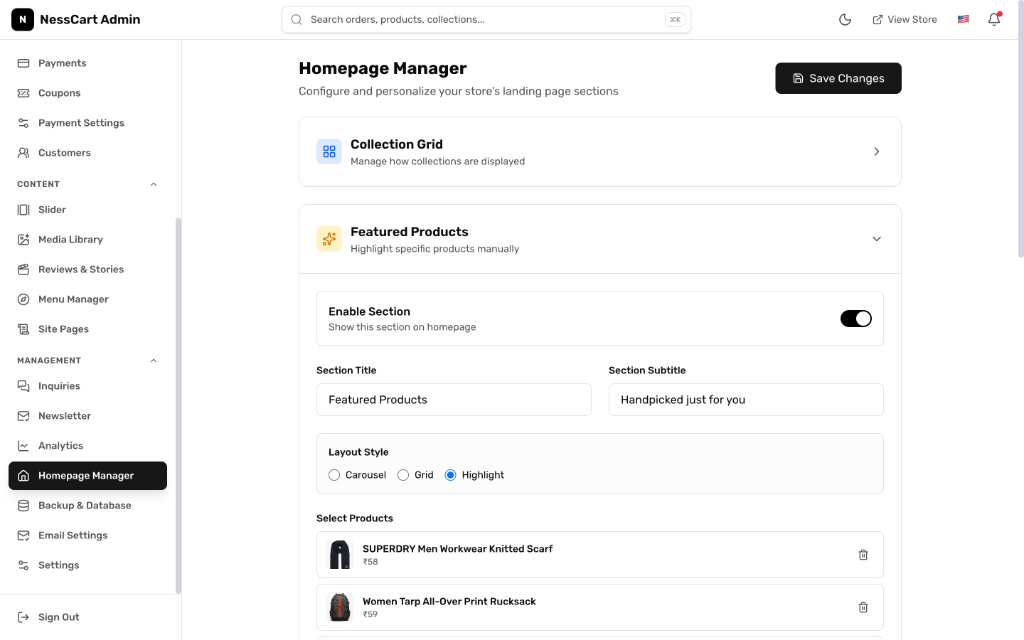
11Homepage Manager
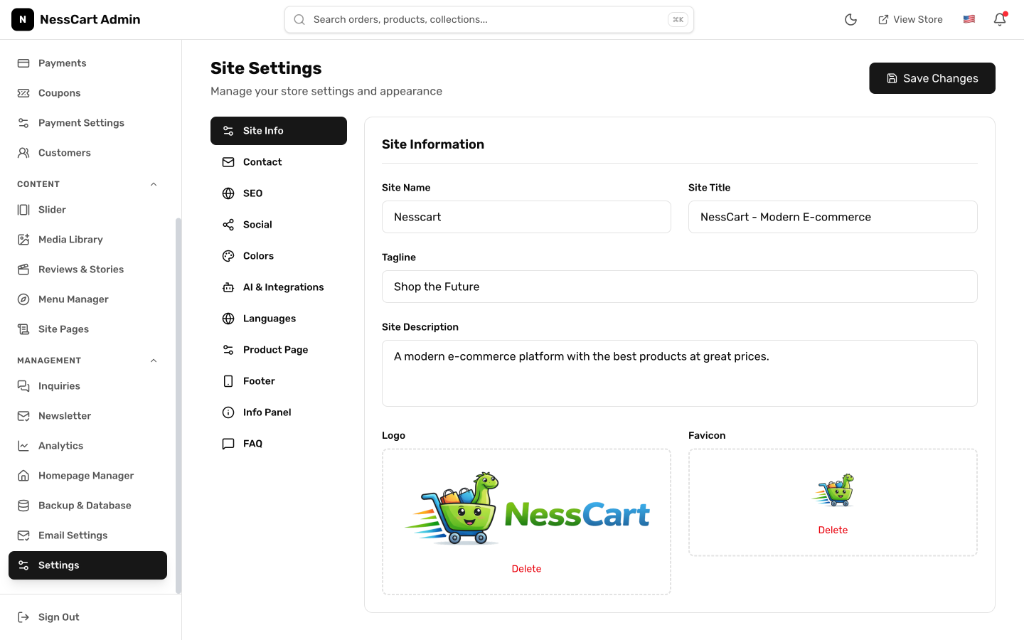
12Site Settings
13Financials & GST
Configure **Stripe, Razorpay, or PhonePe**. Built-in Indian GST engine handles CGST/SGST and IGST logic automatically based on shipping address.
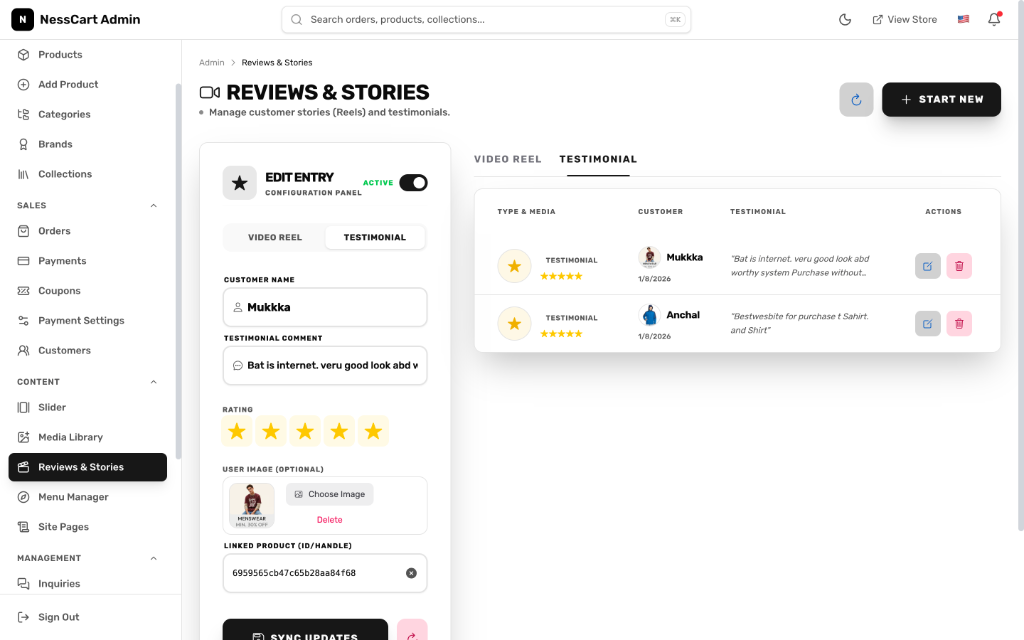
14Reels & Social
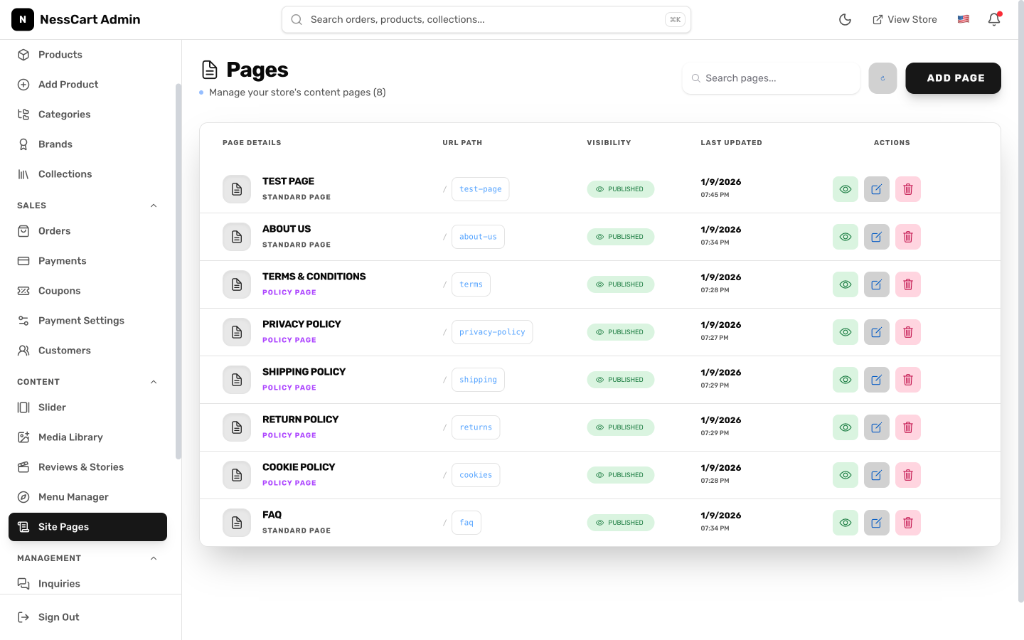
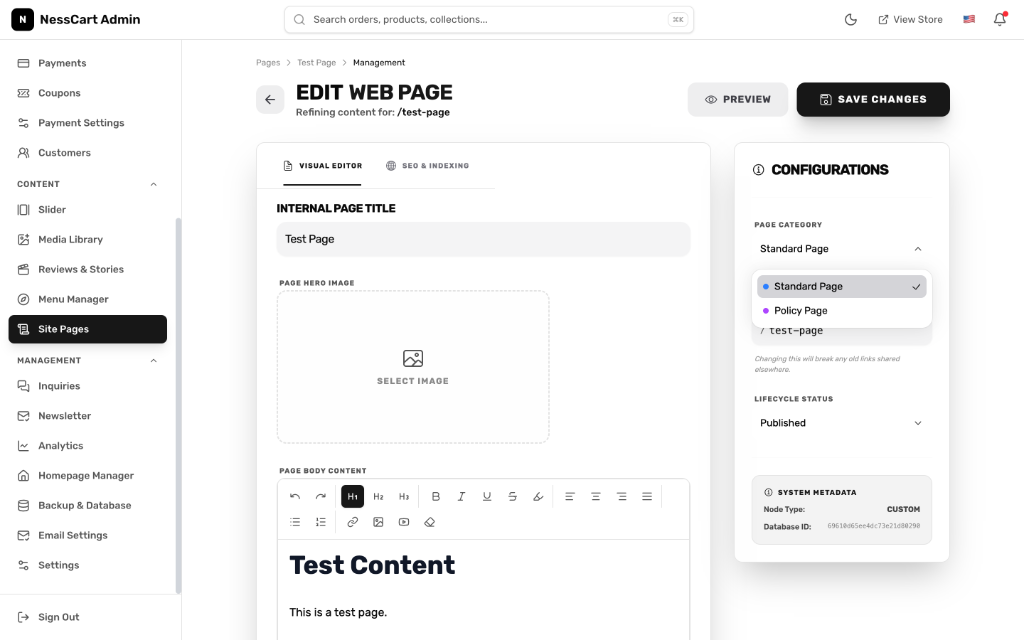
15Dynamic Pages
16AI Content Studio
Magic Describe
Instantly generate high-converting product descriptions from a few keywords.
SEO Gen
Automatic generation of Meta Titles and Descriptions for perfect Google ranking.
Summary Bot
Turn long manufacturer technical docs into customer-friendly bullet points.